


If your computer has started to slow down, freeze frequently, or take forever to start up, it’s time to give it a complete tune-up. Advanced SystemCare 19 is a comprehensive system optimization program designed by IObit to clean junk files, fix registry issues, manage startup items, and speed up overall performance. This guide will walk you through each step to help you use Advanced SystemCare 19 effectively for a full PC cleaning and tune-up.
Step 1: Install and Launch Advanced SystemCare 19
Begin by installing Advanced SystemCare 19 on your PC. Once installed, launch the program to access the main dashboard. You’ll notice sections like “Clean & Optimize,” “Speed Up,” “Protect,” and “Toolbox.” These modules give you complete control over how you maintain and boost your computer’s performance. Before you begin any scan, it’s good to close unnecessary applications so the software can work efficiently.

Step 2: Run an Initial Scan
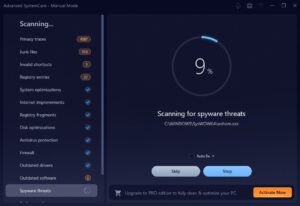
From the main dashboard, click on the Scan button. Advanced SystemCare 19 will automatically start analyzing your computer for junk files, registry errors, broken shortcuts, and system vulnerabilities.
The scan results will display different categories such as:
- Junk Files: Temporary files, cache, and logs that are safe to remove.
- Registry Issues: Invalid or outdated entries that slow down your system.
- Startup Optimization: Programs that automatically start when Windows boots up.
- Privacy Traces: Browsing and activity records that may compromise privacy.
Once the scan is complete, review the list of issues and click Fix to allow Advanced SystemCare 19 to clean and repair everything safely.
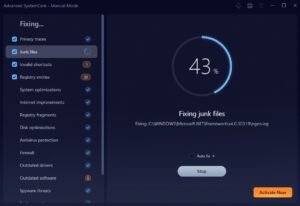
Step 3: Remove Junk and Temporary Files
The Junk File Clean feature is one of the most useful tools in Advanced SystemCare 19. It scans your hard drives and deletes temporary files, cache, and leftover files from uninstalled applications.
After scanning, review the files marked for deletion to make sure no important data is included. Then click Clean to remove them. This will free up disk space and make your computer run more efficiently.
Step 4: Deep Clean the Registry
Over time, your Windows registry can become cluttered with invalid entries left behind by uninstalled software and system changes.
Advanced SystemCare 19’s Registry Cleaner safely scans and removes these unnecessary entries. This helps eliminate system errors, reduces crashes, and makes your system more stable.
Before performing this operation, it’s always wise to create a backup (the software can do this automatically). Once the backup is ready, click Repair to clean up the registry safely.
Step 5: Manage Startup Items
One of the biggest reasons for slow boot times is the number of programs that start automatically when Windows launches.
Go to the Startup Optimization section under the Speed Up tab. Advanced SystemCare 19 will list all the startup programs. Disable any that you don’t use regularly, especially those that are not essential for system operations.
This step alone can significantly reduce your boot time and free up memory for other tasks.
Step 6: Use Turbo Boost for Instant Speed
After the initial cleaning, activate the Turbo Boost feature. This tool shuts down unnecessary background processes and services that consume CPU and memory resources.
Turbo Boost offers three modes:
- Work Mode – For smoother multitasking and productivity.
- Game Mode – Prioritizes system resources for gaming.
- Economy Mode – Reduces energy consumption for laptops.
Choose the mode that fits your needs. You’ll immediately notice faster performance and improved responsiveness.
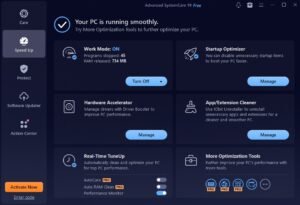
Step 7: Keep All Programs Up-to-date
You can also use the Software Updater to find and update outdated programs, ensuring your system runs the latest versions for better security and stability.

Step 8: Enable AutoCare for Continuous Maintenance
To keep your system in top condition without manual effort, enable the AutoCare feature. It allows Advanced SystemCare 19 to automatically perform scans and cleanups on a schedule you set.
You can choose daily, weekly, or monthly scans, and even specify which items should be cleaned automatically — such as junk files or registry issues. With AutoCare active, your PC stays optimized without you having to remember to run scans.
Step 9: Perform Final Checks and Restart
Once you’ve gone through the cleaning and optimization steps, restart your computer. Upon reboot, you should notice:
- Faster startup times
- Quicker app loading
- Reduced system lag
- Smoother overall performance
Running Advanced SystemCare 19 regularly — ideally once a week — ensures your computer stays in peak condition and doesn’t accumulate unnecessary clutter again.
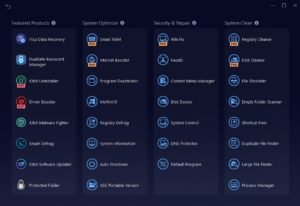
Step 10: Extra Tools for Complete Control
Advanced SystemCare 19 also offers a Toolbox filled with advanced utilities for more in-depth maintenance, such as:
- Disk Optimization for defragmenting hard drives
- File Shredder for securely deleting confidential files
- System Information to monitor PC health and performance
- Cloned File Scanner to detect duplicate files and recover storage space
These additional tools make it easy to fine-tune your system beyond basic cleaning.
Final Thoughts
Using Advanced SystemCare 19 regularly can make a huge difference in how your computer performs. From cleaning out unnecessary files to managing background programs, this software offers everything you need for a smooth, optimized, and efficient system.
Whether you use your PC for work, gaming, or general browsing, following these steps ensures it stays fast, secure, and clutter-free. Advanced SystemCare 19 isn’t just about cleaning — it’s about maintaining your computer’s health so you can focus on what matters most.