I didn’t expect to spend my Tuesday evenings troubleshooting AI-generated videos. But here I am, three project folders deep, trying to figure out why some photos animate smoothly while others just… don’t.
Image to video tools promise a lot. The reality? It’s messier, slower, and more interesting than the landing pages suggest. This isn’t a review or a feature breakdown. It’s what actually happens when you move past the demo phase and try to build these tools into real work.
The First Week: Expectation vs. Upload
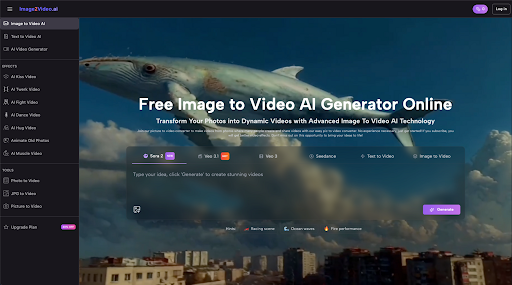
Most people start the same way I did — upload a photo, type something vague like “make it move,” and wait. The platform I tested accepts JPEG and PNG files, processes for about five minutes, then delivers an MP4. Simple enough on paper.
What the tutorials don’t mention is how much your input quality matters. Not resolution or lighting (though those help), but composition. A centered portrait with clear subject separation? Usually fine. A busy street scene with overlapping elements? The AI often picks the wrong focal point or creates motion that feels off.
I learned this by uploading 14 different images in one sitting and comparing results. About half worked well enough to use. The other half taught me more about what Image to Video AI actually does under the hood — it’s interpreting depth, predicting motion paths, and filling gaps. When your photo doesn’t give it clear signals, it guesses. Sometimes poorly.
Understanding What “AI-Powered” Actually Means Here
The term gets thrown around loosely. In this context, photo to video conversion relies on depth estimation and motion synthesis. The system analyzes your static image, builds a depth map, then generates intermediate frames to create the illusion of camera movement or subject animation.
This works best when:
- Your subject has clear foreground/background separation
- Lighting creates natural depth cues
- The composition suggests an obvious motion direction
It struggles with:
- Flat, evenly-lit product shots
- Complex textures (grass, hair, water)
- Images where the “action” isn’t visually obvious
I didn’t find this in any documentation. I figured it out after my seventh failed attempt to animate a flat-lay product photo. The AI kept adding a weird zoom that made the image look warped rather than dynamic.
The Prompt Problem Nobody Talks About
You’re supposed to describe your vision in natural language. Sounds easy. It’s not.
“Make the background move” is too vague. “Pan left slowly while keeping the subject centered” is better but still inconsistent. After weeks of testing, I’ve found that shorter, directive prompts work better than descriptive ones. “Zoom in, slow” outperforms “Create a gentle, cinematic zoom effect that draws attention to the subject.”
The platform processes your text, but it’s not reading your mind. It’s matching keywords to pre-trained motion patterns. When I stopped trying to write creative briefs and started writing technical instructions, my success rate improved noticeably.
Where This Actually Saves Time (And Where It Doesn’t)
Let’s be specific. Creating a 5-second animated social media post from a static product photo used to take me about 45 minutes in traditional video editing software. With Image to Video AI, it takes about 8 minutes — 5 for processing, 3 for adjustments and export.
That’s real time savings, but only for specific use cases:
Works well for:
- Social media teasers and story content
- Quick product showcases with simple motion
- Turning photo galleries into basic video slideshows
- Testing motion concepts before full video production
Still faster to do manually:
- Anything requiring precise timing or complex sequences
- Videos where audio sync matters
- Content that needs multiple revision rounds
- Projects with specific brand motion guidelines
I use it for rough drafts and volume work now. For anything client-facing or high-stakes, I still default to traditional tools.
The Learning Curve Is Backward
Most software gets easier as you use it more. Image to Video AI tools are different — they get more complicated.
Week one felt magical. Upload, prompt, done. Week four involved testing different image crops, adjusting prompt syntax, comparing motion styles, and building a personal reference library of what works. I now spend more time preparing images before upload than I do waiting for processing.
This isn’t a complaint. It’s just different from what I expected. The tool didn’t eliminate creative decision-making; it shifted where that work happens. Instead of keyframing in an editor, I’m now optimizing source material and refining text instructions.
Real Limitations I Hit Repeatedly
The 5-second generation limit is the obvious one. For most social platforms, that’s actually fine. For anything narrative or explanatory, it’s restrictive.
More frustrating is the lack of consistency between generations. Upload the same photo twice with the same prompt, and you’ll get similar but not identical results. This makes iterative refinement difficult. You can’t just tweak one variable and see the isolated effect — each generation is a fresh interpretation.
Camera motion control exists but feels limited. You can direct pan, zoom, and tilt, but fine-tuning the speed or easing curve isn’t really possible through text prompts alone. It’s either “fast” or “slow,” with little middle ground.
When Free Tier Actually Works
I tested this on the free plan for six weeks before considering an upgrade. The no-watermark policy is legitimate, which matters for actual use rather than just testing.
Free tier limitations I noticed:
- Processing queue times increase during peak hours
- No access to advanced effects library (which I didn’t miss much)
- Lower output resolution (acceptable for social, not for client work)
For someone testing whether photo to video conversion fits their workflow, free tier is genuinely usable. I produced about 30 pieces of content before hitting a point where the limitations mattered more than the cost savings.
What Changed in My Workflow
I don’t use this tool for everything now. I use it for specific situations where the tradeoff makes sense:
- Volume content days: When I need 10+ social posts from a photo shoot, batch processing through Image to Video AI is significantly faster than manual animation
- Concept testing: Before pitching a video idea, I’ll generate a quick mockup to see if the motion concept works
- Repurposing existing assets: Old campaign photos get new life as animated content without reshooting
What I stopped trying to do:
- Replace full video production
- Create anything requiring precise brand compliance
- Generate content where motion quality is the primary value
Adjusting Expectations Through Use
The biggest shift wasn’t technical — it was mental. I stopped expecting the AI to read my creative intent and started treating it like a specialized tool with specific capabilities.
Think of it less like “AI creates videos for you” and more like “AI adds motion to static images within defined parameters.” That reframing made the tool more useful because I stopped fighting against what it wasn’t designed to do.
Is This Worth Learning Right Now?
If you’re already producing visual content regularly and have a backlog of static images, probably yes. The time investment to learn effective prompting is maybe 10-15 hours of active experimentation. After that, you’ll know whether it fits your work.
If you’re hoping this replaces video production entirely, probably not yet. The output quality is good enough for certain contexts but not all contexts. And the creative control is still limited compared to traditional tools.
Image to Video AI sits in an interesting middle space — more capable than basic slideshow makers, less flexible than full video editors. Whether that middle space is useful depends entirely on what you’re trying to create and how much time you’re willing to spend learning its specific quirks.
I’m still using it. Just differently than I expected to when I started.